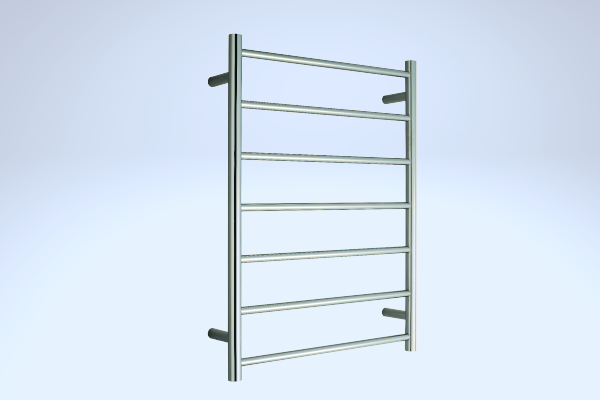
Warmup recommends towel warmers to be installed horizontal only. Towel warmer bars are designed to evenly distribute heat across the entire surface of the towel. Towel bars work most efficiently when towels are hung flat against them. Hanging a towel vertically reduces the surface area of the towel that’s in contact with the bar, which means it will take longer for the towel to warm up, and you might not get the desired warmth. When you hang a towel vertically, only a small portion of the towel comes into contact with the bar, resulting in uneven heating. In addition, towel bars are designed and tested to be installed horizontally, according to our installation manual. Installing them vertically could potentially compromise their structural integrity and safety.

Towel Warmers
Home / Bathroom Collection
Warmup® Towel Warmers were designed and built with simplicity in mind. Constructed of high quality 304 stainless steel, expertly welded in unique designs, Warmup towel warmers are safe and easy to use.
In order to wire a single towel warmer to code, you must follow the kit and video. In addition, you must follow Authorities Having Jurisdiction (AHJ).
1 – M10-1 – 10mm Tap
1 – Undercounter Connectors
1 – 3/8″ Flexible Metal Conduit (Alt: 6′ 3/8″ whip and remove the wire)
1 – 3/8″ Conduit Connector
1 – 2″ x 4″ Metal Junction Box with 3/8″ Knockouts
For a visual demonstration, please view the video below.
Wondering what the dimensions are of Warmup towel warmers as you prepare for your project? Find the information you need here.
If you are installing a Warmup towel warmer you may be interested in seeing an installation video. Click here fora video with tips and tricks.
Warmup offers a wide range of towel warmers that opperate as ON or OFF with no specific temperature setting.
If you are investing in a Warmup towel warmer you may be wondering if maintance will be required. Learn more here about this topic.
Installing the Warmup Liberty single bar towel warmer? Find useful information here to follow along with.
This post explains how to mount and position your Towel Warmer properly in your space.
This page explains the different circumstances in which you might wire your Towel Warmer to a switch or to a thermostat.
Bathroom Collection
- 3iE Energy-Monitoring Thermostat
- 4iE Smart WiFi Thermostat
- DCM-PRO Cable
- DCM-PRO Fleece-Back Membrane
- DCM-PRO Peel-And-Stick Membrane
- DCM-PRO Waterproofing Kit
- Loose Wire – NADWS
- Mirror Defoggers
- StickyMat System – DWM
- Tempo Thermostat
- TH115 Floor Heating Thermostat
- Towel Warmers
- UCCG-4991 Floor Heating Thermostat
- Ultralight Insulation Boards
Floor Heating
- DCM-PRO Cable
- DCM-PRO Fleece-Back Membrane
- DCM-PRO Peel-And-Stick Membrane
- DCM-PRO Waterproofing Kit
- Dual Cable Tester
- Fixing Band
- Foil Heating System – FOIL
- Loose Wire – NADWS
- StickyMat System – DWM
- Ultralight Insulation Boards
- Warmup Inslab Cable – INSLAB
- Watchdog
Insulation
Outdoor Controllers
- APS-3C
- CDP 2 Remote Control
- COMMBOX-600
- DS 5 Outdoor Snow Melting Controller
- DS 8 Outdoor Snow Melting Controller
- DS 9 Outdoor Snow Melting Controller
- DS-2C Outdoor Snow Melting Controller
- ETO2 Snow and Ice Melting Controller
- ETO3 Outdoor Snow Melting Controller
- GF-PRO
- PRO-REMOTE
- SNOPRO-100 Series
- TRF115-005 Roof & Gutter Deicing
- WSM-252W Smart WiFi Panel
- WSM-63 Relay Timer Panel
Outdoor Sensors
Pipe Trace
Repairs
- Digital multimeter
- Infrared Thermal Camera
- Megger (acc-megg)
- Repair – Outdoors
- Repair Kit – End Cap
- Repair Kit – Joint
- Repair Kit – Wire
- TDR Meter Cable Tester
Snow and Ice Melting
- Dual Cable Tester
- Self-Regulating De-Icing Cable – SRK
- Snow Melting Cable – WSM
- Snow Melting Mat – WSMM
![Thumbnail [200x250]](/wp-content/uploads/Indoor-Systems-Page-Image.png)
![Thumbnail [200x250]](/wp-content/uploads/image-13.png)
![Thumbnail [200x250]](/wp-content/uploads/Projects-Image.png)