When renovating a bathroom, many homeowners consider upgrading their space with a curbless shower with a linear drain and underfloor heating for a seamless, modern design. This combination not only enhances comfort and accessibility but also delivers a luxurious aesthetic that makes the space feel larger and more open.
In this guide, we’ll cover everything you need to know to achieve a flawless curbless shower installation, including:
- What a linear drain is and why it’s ideal for curbless shower designsWhat a linear drain is and why it’s ideal for curbless shower designs
- The key benefits of a barrier-free shower, from accessibility to aesthetics
- Step-by-step installation and waterproofing considerations
- How to integrate underfloor heating for maximum comfort and efficiency
- Where to purchase underfloor heating for your project
What is a linear drain?
A linear shower drain (also called a trench drain) is a long, narrow, channel-style drain typically installed along one side of the shower rather than a round or square point-drain.
Unlike traditional drains which require the floor to slope in four directions towards a single point, a linear drain usually only requires a single slope from one direction into the drain.
What are the benefits of installing a curbless shower with a linear drain?
Aesthetic Benefits: Sleek & Seamless Transition
With a curbless (no threshold) design and a linear drain in place, you achieve a clean, uninterrupted floor plane. The lack of a raised curb creates an open, airy feel that is perfect for a contemporary bathroom. The long, slim drain blends elegantly with large-format tiles and minimalist finishes.
Increased Safety & Accessibility
Eliminating the curb means easier entry and exit to the shower which is especially beneficial for users with mobility concerns or those designing for aging-in-place scenarios. The smooth transition reduces trip-hazards and friction between wet and dry zones.
Design & Installation Flexibility
A linear drain allows placement flexibility: along the wall, across the entrance, or centered. Because only one slope is required, it supports larger tile formats, continuous flooring, and custom layouts without the complexity of multi-direction slopes.
Preparing for a curbless shower with linear drain installation
Layout & Drain Placement
The layout of your curbless shower will depend on various factors, including the size of your bathroom, the placement of existing plumbing, and the entry orientation of the shower. The placement of the linear drain is a critical aspect of this planning process, as it will affect the slope, transitions, and waterproofing strategy
You can choose to place the linear drain against the wall, at the entrance of the shower, or anywhere in between depending on the desired flow of water and your chosen aesthetic. The layout design should also consider the size and shape of your tiles, as larger tiles require less grout and offer a more seamless appearance.
Slope Calculation
The shower floor must be sloped toward the drain to remove water effectively and to prevent water from pooling or spilling onto the bathroom floor. The standard slope for a shower floor is 1/4 inch per foot. This ensures optimal water drainage while providing a comfortable and safe surface to stand on. Accurate slope calculation is essential for the functionality of your shower and should be carried out with precision.
Waterproofing Considerations
Waterproofing is critical for a curbless shower installation, as it helps to prevent water damage and potential mold growth. Methods for waterproofing a shower include waterproof membrane, paint-on liquid waterproofing, and waterproofing boards.
The waterproofing should completely seal the shower area, including the corners and the connection with the linear drain, as well as extending beyond the shower area onto the bathroom floor. This will ensure that any water that escapes the shower area doesn’t seep into the subfloor.
Installation steps for a curbless shower with linear drain
The installation of a curbless shower with a linear drain involves several steps that must be completed with precision to ensure the shower’s functionality and durability. From preparing the subfloor to installing the drain, each step is crucial to the final result.
Always refer to the manufacturer’s instructions when working with specific products and consider hiring a professional if you are unsure about any aspect of the installation process.
Subfloor Preparation
- Ensure the subfloor is clean, stable, and level before beginning the installation process. Remove any debris, old adhesive, or unevenness that may interfere with the bonding of new materials.
- Use a self-leveling compound or mortar bed where needed to produce a smooth base, absent of any dips or rises.
- Create the single directional slope towards the linear drain, ensuring that all water is directed towards the drain and will not spill beyond the threshold. The slope can be created using either a pre-sloped pan or a mortar bed.
Install the Linear Drain Body
- Start by cutting a channel in the subfloor where the drain will be placed. The size of this channel should correspond to the size of the linear drain.
- Connect the drain body to the plumbing system, following the manufacturers’ instructions to ensure a secure fit. The drain should be set at the proper height to account for the additional membranes and finished flooring tile.
- Align the drain body with the slope of the shower floor and secure it in place. The drain body should be well supported to prevent any movement or shifting over time.
Apply Waterproofing System
- Apply the waterproof membrane (sheet, liquid, or board system) across the floor and walls of the shower. Pay special attention to corners, the drain flange, and the transition to the surrounding bathroom floor to ensure that they are properly sealed to prevent any potential leaks.
- Extend the waterproofing beyond the immediate shower area and on to the main bathroom floor to protect the overall subfloor from stray moisture.
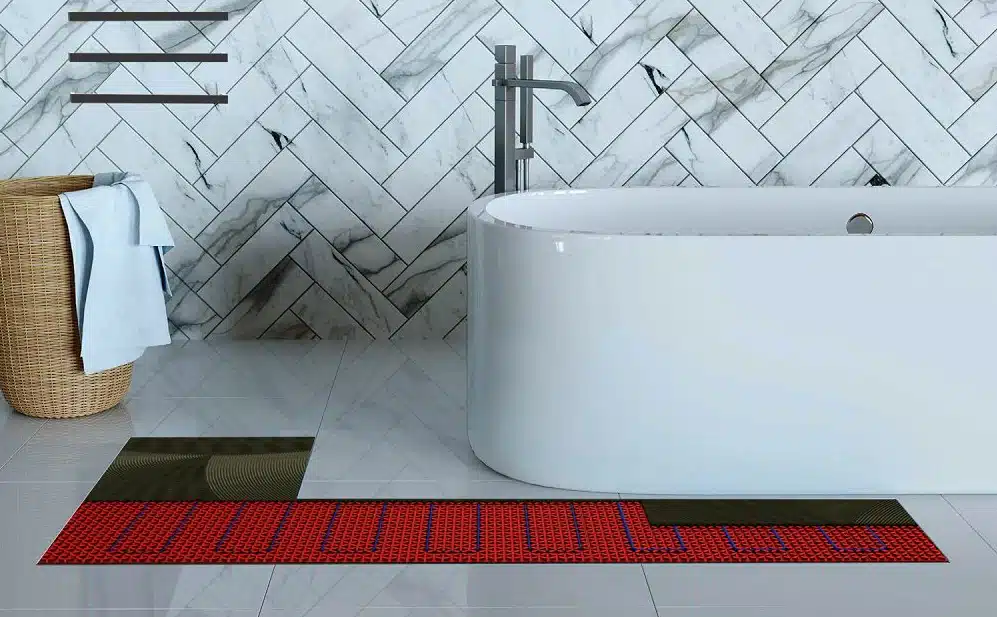
Install radiant floor heat for added comfort and luxury
Adding an electric radiant heated floor both beneath your curbless shower and under your bathroom floor is a luxurious upgrade that brings comfort and enhances safety. Here are a few key benefits:
- Comfort: Stepping onto a warm floor, especially during the colder months, can transform your shower experience, making it more enjoyable and comfortable.
- Energy Efficiency: Radiant floor heating systems can be more energy-efficient than traditional forced-air heating systems because they heat the room from the ground up and eliminate heat loss through ducts. They can also be paired with a smart thermostat for automatic functionality, ensuring the system is only running at the right time for you.
- Reduced Moisture: By maintaining a warm surface, radiant floor heating can help reduce moisture on your shower floor, thereby decreasing the potential for slips and falls while also helping to prevent mold growth.
Incorporating radiant floor heating with your curbless shower
Installing radiant floor heating during your curbless shower construction is straightforward and can be seamlessly integrated with your existing plans. Here’s how:
- Choosing the Right System: Warmup offers a variety of underfloor heating systems, including the DCM-PRO System which can be used with a variety of floor types. The DCM-PRO System utilizes an uncoupling membrane that has the added advantage of protecting the floor tiles from cracks resulting from subfloor shifting.
- Installation: The heating system should be installed over the waterproofing layer but beneath the floor tiles. This will allow the heat to rise directly through the tile to warm the surface of the floor. Ensure the heating cables are evenly spaced for consistent heating and avoid placing the heating cables directly under the linear drain.
- Testing: It is important to test the system before, during, and after installation to ensure proper functionality before proceeding with the tiling process. Refer to the corresponding product literature for acceptable resistance readings.
- Smart Control: With a dedicated Smart Thermostat, you can control the temperature of your radiant floor heating to your liking, ensuring a warm, comfortable surface every time you step into the shower.
For more detailed information on installing radiant heating in your bathroom, read our expert article.
Craft a luxurious linearly drain curbless heated shower floor with Warmup
If you’re looking to create a luxurious, modern bathroom experience, consider incorporating a linear drain and Warmup radiant floor heating into your curbless shower.
Installing radiant floor heating in your shower can provide enhanced comfort, energy efficiency, and safety benefits that are sure to take your showering experience to the next level.
Get a free, instant quote today to find the best Warmup system for your requirements. For more maintenance and installation tips, check out our YouTube channel.